
Many years ago, I was the pastry chef at a Peruvian restaurant, where we made so much arroz con leche so often that, after a while, I couldn’t stand to eat it…I don’t have that problem anymore!
❤︎
ARROZ CON LECHE…aka…
RICE PUDDING:
- 100 grams white rice
(*skip Step 1 & read the note before Step 2 if you’re using pre~cooked rice) - 250 ml. water
- pinch of salt
- a little pat of butter (~1 tsp.)
- 120 grams (one small bottle) sweetened condensed milk
- 350 ml. milk (any kind is okay!)
- one cinnamon stick
- one vanilla bean (or 2 tsp. vanilla extract)
Because of my time spent making “fancy” rice pudding by the vat in a posh Peruvian place, I have a sort of cook’s sense about it, and I never even bother with a recipe. Despite living in Japan, I don’t eat a lot of rice, so whenever I make any at all, it’s those leftovers that get turned into rice pudding…with indiscriminate amounts of rice and milk and sugar and whatever-else-I’m-feeling like just flung into a pot, and adjusted as I’m making it.
For this post, I actually had to follow a recipe—or rather, to write one down as I went along—but I also had to remember to make note of any adjustments I made as I cooked. The result tasted good, but something just didn’t feel right, so I made it again, and tweaked the written amounts a little more in the hopes of getting you closer to what I’m tasting.
With all sincerity, this is a technique which is easy to pick up after making any recipe even just a few times—especially if you really enjoy eating it!—and it becomes almost second nature to add a splash more of this or a pinch more of that in order to get your desired results. As a matter of fact, many home cooks have recipes which they think that they “follow” every time, but they quite often make little changes without even thinking about it…a big reason why, when asking someone for a recipe of theirs, it doesn’t always turn out quite right when you try to make it. They’re (usually) not trying to screw with you; they just don’t even think about the little mods they make along the way!

I think this is really similar to how many people think of cooking vs. baking: cooking is something that many people can do, but in their minds, baking is a science. And while we do use scales in professional kitchens, there’s still so much feel that goes into baking. For example, flours differ from brand to brand (or even throughout the year!), and sometimes an exactly scaled recipe just doesn’t look or feel right. In the bake shop, we often say “you have to put your hands into the dough”…
This isn’t just some zen~like voodoo or mindfulness bullshit. This literally means: touch. stuff. Do it often. Develop the same kind of so-called sixth sense that many people have while cooking something for dinner, but do it for bread & muffins & cookies & whatnot. For example, let me ask you: how often do you taste what you’re making as you’re cooking it? How often do you add a pinch more salt or a sprinkling more of spice? Well, when I make a loaf of bread, I do the same thing…but I add a little more flour or even some milk or water a few drops at a time, letting it continue mixing until it not just feels right, but it is right.
I’m a bit off on a tangent, aren’t I? Shocking! The point is that for this recipe, I’m not only going to give you amounts, but I’m going to tell you what to look for. There is no “this takes precisely ten minutes”…there is only “this is done when it’s done”.
So…wanna try?
1. Start by putting your 100 grams of white rice and 250 ml. of water into something like a 2-liter / 2-quart pot, along with a pinch of salt. I also like to add a pat of butter, but you can leave that out if you like.
For this recipe, I used jasmine rice because I love the flavor, but almost any white rice will do…however longer grained rices (like jasmine) will taste more like traditional rice pudding as you probably know it, while short grained rices (like everyday Japanese rice) creates a more starchy result. Anyway: bring the water to a boil, reduce the heat to the lowest you’ve got, and cover the pot.
It’s a long~held belief that you shouldn’t lift the lid on rice while it’s cooking, but eff that noise. Go ahead and begin checking on the rice after 5~10 minutes, giving it a little stir, and putting the lid back on if there’s still water in there. Mine took in the neighborhood of 15 minutes, but you should take it off of the heat according to your rice and pan and stovetop. When the water is evaporated, and the rice is cooked, we’re ready to pudding~ize it!

* If you want to use up some leftover rice, start from this point—obviously skipping Step 1—and begin by adding 300 grams of cooked rice to a pot.
❤︎
2. Add the 120 ml. of condensed milk (this is equal to one small tube, as shown above) and the 350 ml. of plain milk to the cooked rice. I used whole milk for this recipe, but the classic choice is to use evaporated milk. Yum! Sadly, that’s fairly hard to come by in the Japans, so I’ve adjusted this recipe to use whole milk…but feel free to use whatever you have on hand—low-fat, soy, coconut!—so long as it isn’t sweetened.
3. Halve the vanilla bean, scrape out its guts, and throw said guts into the pot along with a cinnamon stick. You can throw the whole vanilla pod in if you’d like, but it really isn’t necessary…and I’m going to tell you something you can do with it in another post. (Note: if you’re using vanilla extract, don’t add it ’til the end of the recipe.)

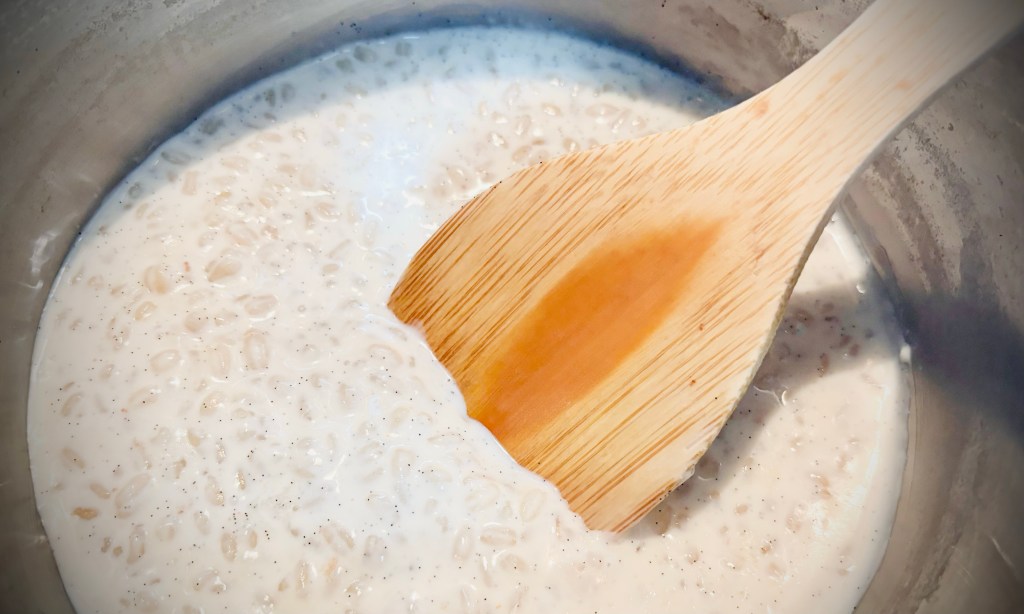
4. Stirring constantly, bring all of the ingredients back up to a boil, then reduce the heat to a gentle simmer. You should stir fairly frequently to make sure your rice pudding isn’t sticking to the pan, but you don’t have to hover over it or anything. Continue cooking uncovered until you can see that the pudding has thickened to the consistency of cream. For me, this took about 10 minutes, but your results will depend largely upon which kind of rice you used. Turn off the heat, and add the vanilla extract if you’re using it.
Be careful not to overcook here, because the rice absorbs more of the liquid as it cools, and can become too thick. However, if that happens, we can (mostly) fix it. Just gimme a sec…

5. Now one more very. important. step: once the pudding is finished cooking, remove it from the heat, cover it once more, and leave it to cool to room temperature. Play some solitaire or do some dishes or something…whatever…just leave it alone.
When the rice pudding is cool, you can fish out the cinnamon stick and discard it (after licking it, of course!) along with the vanilla bean if you added that. Gently stir the pudding and see what you think of the texture. Bear in mind that it will thicken even more after going into the refrigerator, so if you cooked it a bit too much in Step 4, add some more milk a little at a time, stirring until you have the desired soft pudding texture.
Then, either chuck the pot into the fridge if you’re feeling lazy, or spoon it into individual bowls. I usually get about four servings from this, depending upon the final container size. Actually, scratch that…I usually get three servings, as I exercise my cook’s prerogative by eating the fourth while it’s still warm. And licking the spoon. Don’t judge me!
Bam です! That’s all there is to a simple homemade rice pudding! Fell free to gussy it up with chopped nuts, toasted coconut, or whatever you enjoy with it. As always, if you make this recipe, please leave a comment below and tell me about it! I honestly love that! Feel free to ask me any questions you might have, too…I check all of my comments!
Have fun, and see you next time! ❤︎


Leave a comment