
While I am fairly well known for making a tasty deep dish apple pie around the holidays, it takes a considerable amount of time to craft…would that I only craved apple pie at the end of each year!
❤︎
If you’re anything like me, and you’re an unwitting slave to your cravings and whims, you might like to have apple pie any day of the week. Therefore, I have created a quick little recipe using frozen pastry dough (or pie sheet1 as it’s known in Japan) and just one apple. I’d also be willing to bet that you could probably have some messy fun making these little pies with appropriately-aged kid type humans (minus slicing the apple ofc), but I can’t say for sure, as I don’t keep any of them on hand. Small apartment and whatnot; nowhere to store them.
As always, I have created this recipe using products that are readily available in most of Japan, but which shouldn’t be difficult to find other places if you wanted to adapt this recipe. And since frozen pie dough / puff pastry is the most “difficult” to find ingredient, I think these little pies are easy enough to make almost anywhere.
APPLE PIE~LETTES:
- 1 apple of your choice!
- zest & juice of half a lemon
- 50 grams (¼ c.) brown sugar
- 2 Tbs. all-purpose flour
- 2 tsp. apple pie spice
- ½ tsp. vanilla extract or paste
- pinch of salt
- 1 package (2 or 4 pieces) of frozen pie sheet, defrosted
- a bit of milk to brush on the tops
- a bit of coarse sugar (such as demerara), also for the tops
OPTIONAL SUGAR DRIZZLE:
- 30 grams (¼ c.) powdered sugar
- ~2 tsp. milk or water
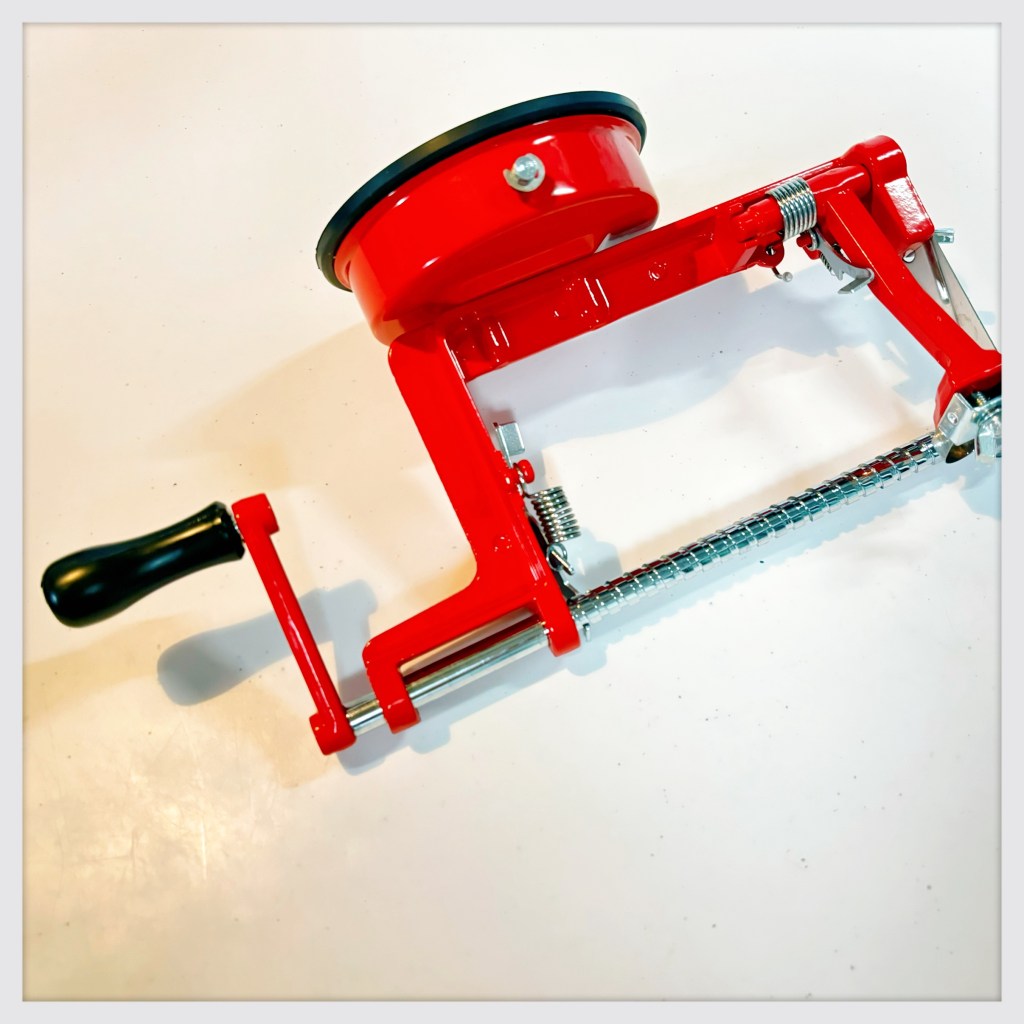
1. Start by peeling your apple, then slicing it fairly thinly. If you don’t have a time-saving-but-space-consuming-apple-dissecting-device as shown above, I recommend cutting the peeled apple into quarters so that you can easily slice out the core, then cutting it into ~5mm (⅛”) slices.
2. Put the apples into a bowl, and add the zest & juice of half a lemon. You can stir it all up to keep the apples from turning brown if you like, but they’re going to do that anyway once we add the sugar and spices, so whatevs.
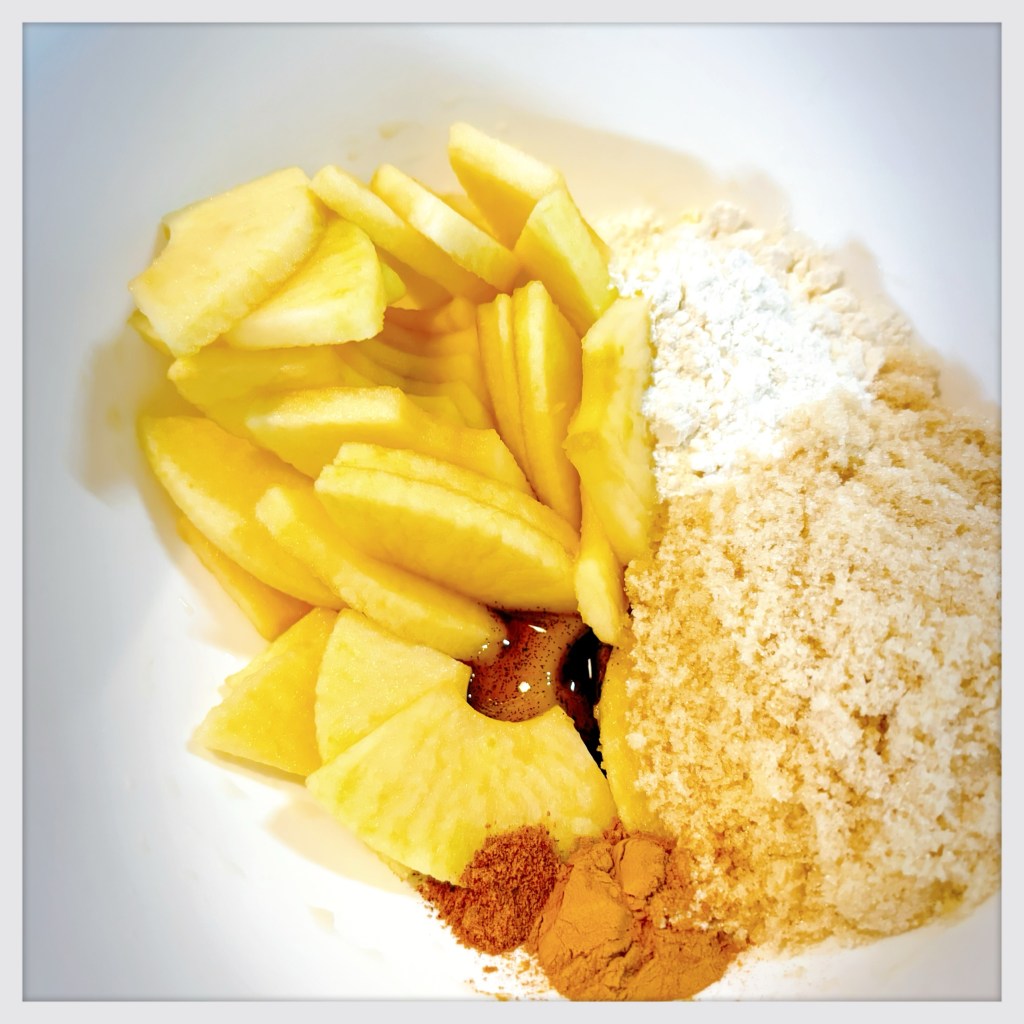
3. Add the 50 grams (¼ c.) of brown sugar, the 2 Tbs. of flour, the 2 tsp. of apple pie spice (or 1½ tsp. cinnamon, ¼ tsp. nutmeg, and ¼ tsp. cardamom), the ½ tsp. of vanilla, and a pinch of salt. Stir gently until the fruit is evenly coated. Mix it well, but don’t beat the holy hell out of it.
4. Now: eat a little piece of apple and see how you like it. Think it’s too sweet? Add a bit more lemon juice to balance it out. Is it too tart? Add another teaspoon or so of brown sugar. Either way, bear in mind that the fruit will release more sweetness as it cooks, and we’re putting even more sugar on top of each little pie. Once you’re satisfied with the taste, set the bowl aside, and turn on the oven to 220°C (425°F).
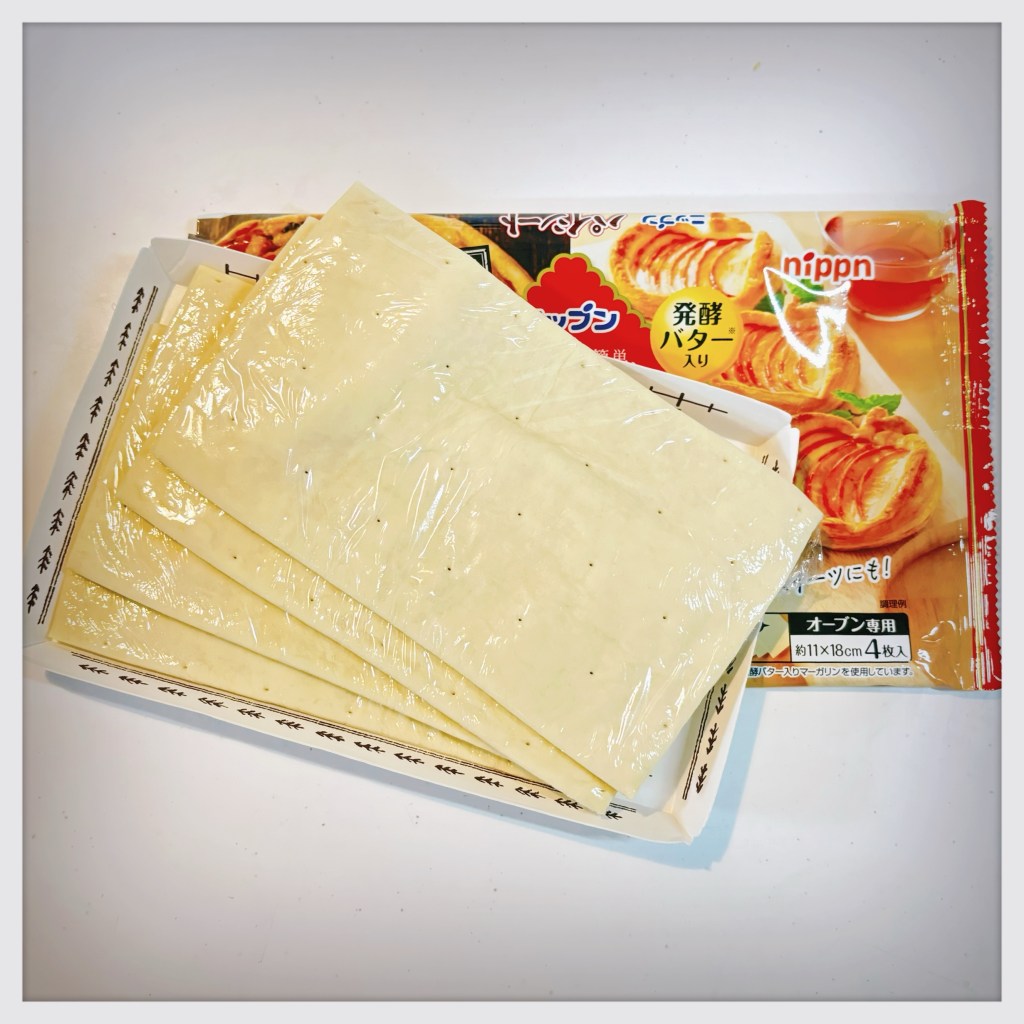
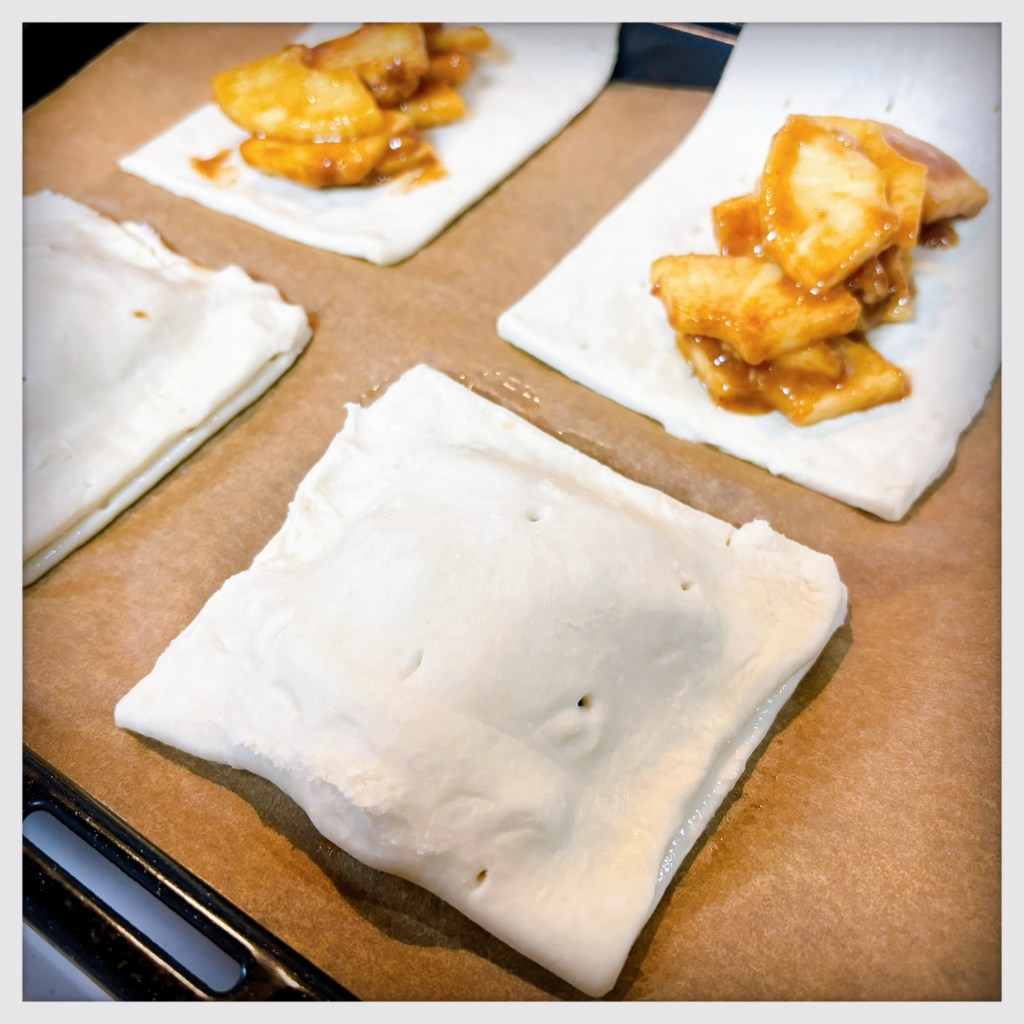
5. Line a sheet pan with parchment paper or a silicone mat. Open the defrosted pie sheets. If you started with two squares, cut each piece in half. If you started with four rectangles, you’re good to go, and you don’t need to cut anything. Either way, you should have four pieces total. Since my pie dough came in rectangles, I simply removed the plastic wrap, and draped one half of each rectangle over the side of the pan, as seen below.
6. Give the apple mixture one last stir—it should be a bit juicier now—and then divide it between the four pieces of pie sheet. You’ll want to put a small mound in the center of one half of each piece, as we’ll be folding them. Like this:
7. Wet your finger, then trace around the apple mixture of one pie~lette. Fold it in half to cover the apples, lining up the edges as best you can, and gently pressing down to seal them up, as shown above. It’s a good idea to try to get any air pockets out before sealing the wee pies, as they might otherwise bake unevenly. Seal closed the remaining pies.
8. Now you’ve got these little squares which aren’t terribly attractive, so let’s fancy them up a bit! Using a fork, work your way around the three sealed sides, pressing down to leave a decorative imprint and to seal the crust completely. It isn’t necessary to squish the folded side, as it’s already closed, and that may cause the dough to rip open. As you can see below, the baby pies are pretty pudgy!
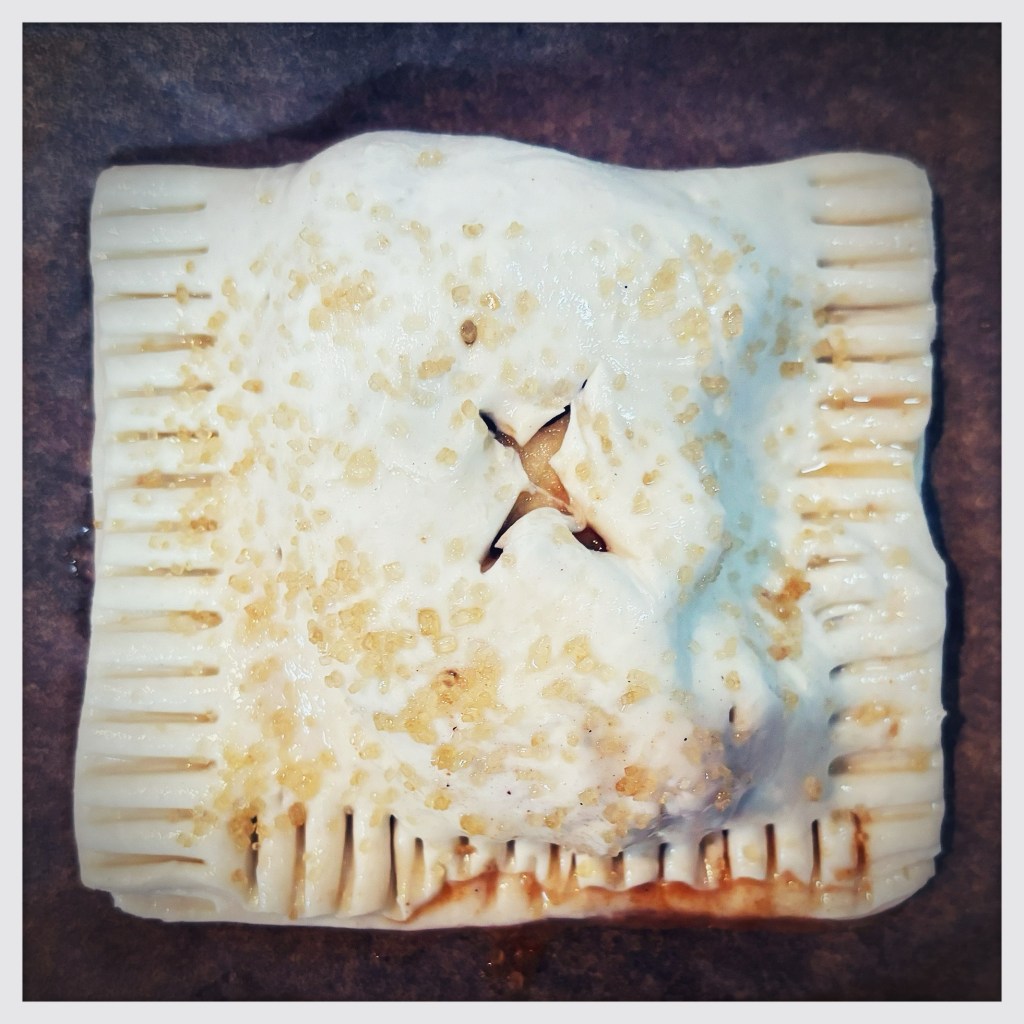
9. Brush the top of each pie with some milk, then sprinkle with the coarse sugar. You want to be fairly liberal with the sugar, as a good amount of it tends to fall off. Slice a small X into the center of each pie with a sharp knife.
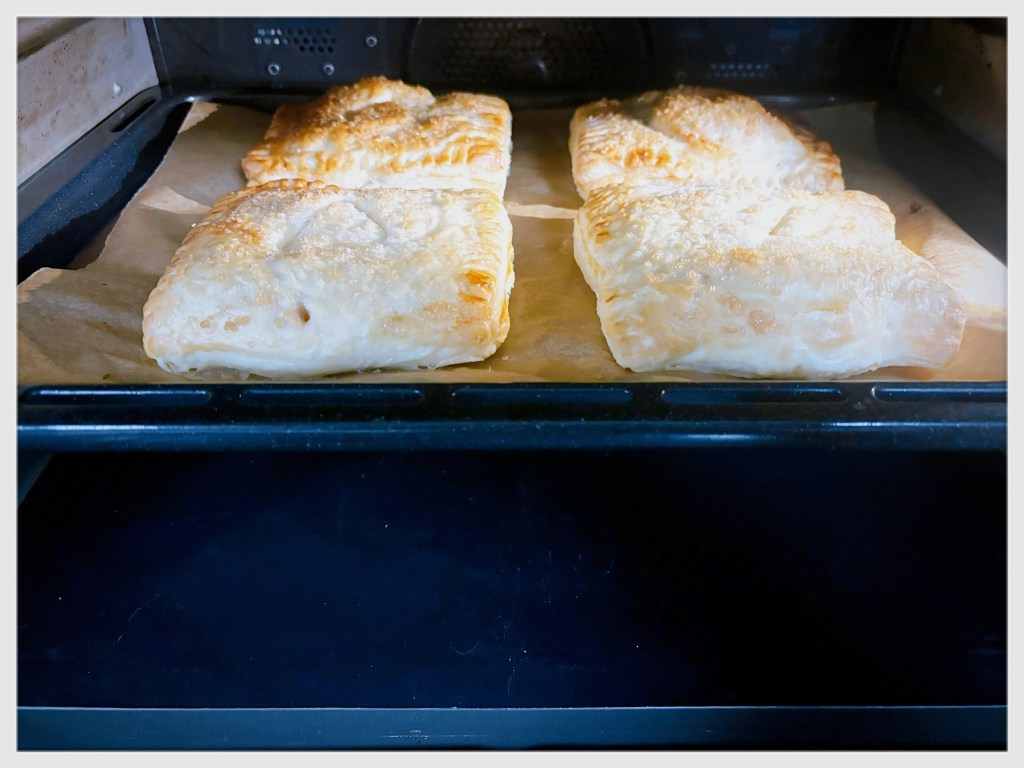
10. Slide the pan into the preheated oven, and cook for ~15 minutes. The dough should be completely puffed up, but it will probably be unevenly browned, as pictured below. Don’t worry…that’s completely normal!
11. Turn the pan around, reduce the temperature to 160°C (325°F), and continue cooking for another 10~15 minutes, or until the dough is evenly browned on the sides and tops. The initial high temperature causes the dough to rise, but the lower temperature allows the pastries to finish cooking, so they don’t collapse when taken out of the oven. Because of that, it’s better to err on the side of cooking them a bit too long (without burning ofc) rather than not cooking them enough.
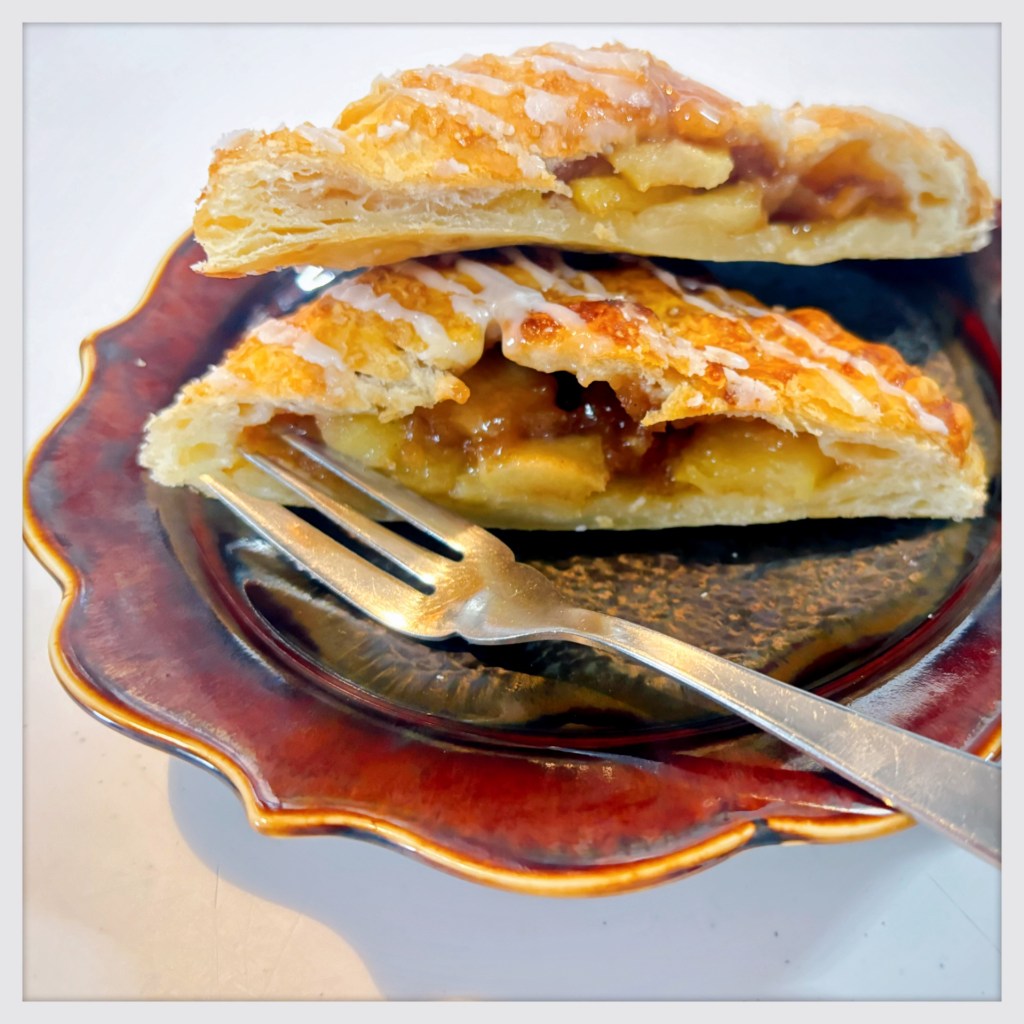
12. When the pies have finished baking, remove them from the oven, and allow them to cool before eating. If you have a cooling rack, you can carefully transfer them onto the rack to cool. It’s all well and good to want your pies warm, but as hot as they are now, they would require a printed warning in most countries.
Yay! You’re all done!
Or…are you…?
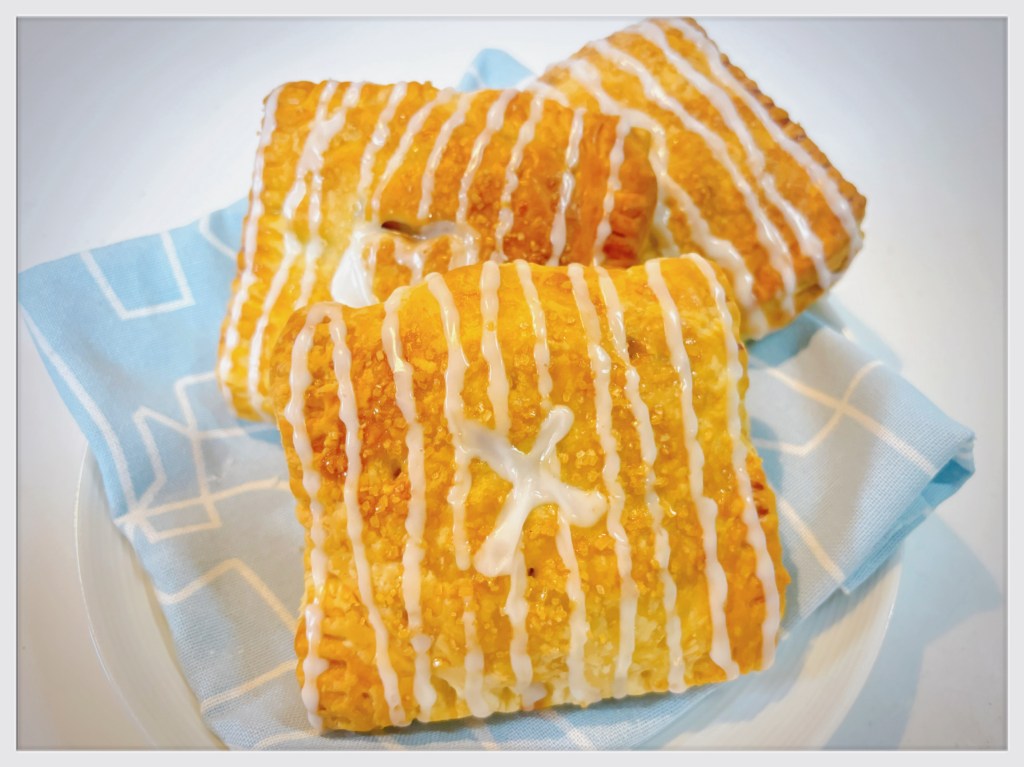
13. While the pies are cooling, you can make the optional glaze if you like: mix the 30 grams (¼ c.) of powdered sugar with the first teaspoon of milk or water…a random cup and a fork are great for this! You want just enough liquid to make a thick goop, so only add the second teaspoon as necessary. If you still need more milk (read: the mixture is not a liquid at all), add it literally a few drops at a time, mixing thoroughly between each addition. If the glaze seems too runny, add more powdered sugar 1 tsp. at a time until it’s nice and thick. When you’re satisfied with the consistency, use a spoon to drizzle the glaze over the pies.
Bam です!
Now you really are done!
I hope you get a chance to make these little pie~lettes & that you enjoy them too. Let me know below if you have any questions or comments! Have fun!
- Despite it’s name, the pie sheet used in this recipe is less like pie dough and more like puff pastry. It is a laminated dough, which requires a hot oven to poof up, and has a much more delicate, flakier texture than pie “dough” as most people know it. ↩︎


Leave a reply to Nate Cancel reply