
What to do when you’re craving coconut & krispy treats? Fling ’em together, of course!
I’ve been having serious “krispy rice” treat cravings recently, and I promised myself that I would make some this week…but then I woke up with a coconut craving, too! The latter is nothing new, as my Amazon bio lists me as “a prodigious lover of all things coconut,” and nothing has ever been more true about yours truly.
My only problem was that, as I scanned tha Inturwebz for coconut krispy treat recipes, none of them seemed to fit what I was imagining. So, I decided to make one up, and see how it worked.
(Narrator: it worked!)

Toasted Coconut Krispy Treats with Browned Butter
- 75 grams flake coconut (or long coconut, as it’s known in Japan)
- 75 grams of butter
- 1 tsp. of vanilla paste or extract
- a pinch of nutmeg (really! but optional, I suppose…)
- 200 grams of big marshmallows
- 150 grams of krispy rice cereal
- ~1 Tbs. chocolate sprinkles / jimmies (optional)
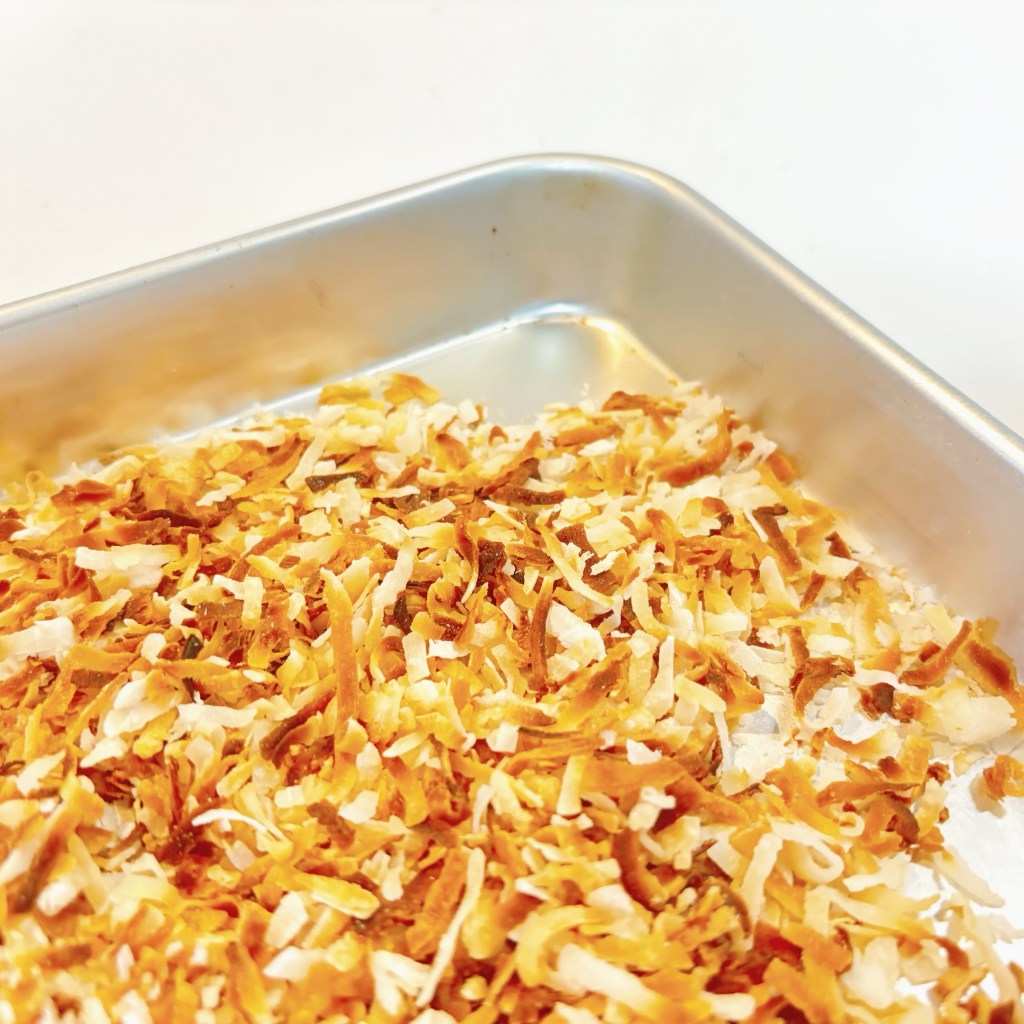
1. Let’s toast the coconut to start. Like most people in Japan, I have this surprisingly convenient little broiler which slides out of my cooktop—most commonly used for fishy things, but I neither can nor want to partake in undersea creatures, thank you very much—and it can be quite the savior when I don’t want to bother turning on the oven. But most of the time, I use it as a toaster, seeing as I obviously have no counter space for a proper one. But, y’know what? It’s a pretty solid toaster, if I do say so myself.
For this recipe, I spread the coconut on a small bat pan, and slid it under the broiler* (set to low!) for ONE. MINUTE. INTERVALS, tossing around the coconut every minute to help it cook evenly, and to keep it from burning. The coconut is done when it’s lightly & evenly golden brown…we want it to become more flavorful by toasting it, but we don’t want it to be too brittle in our chewy treats! Set it aside to cool.
2. Now, butter an appropriately sized rectangular pan, and set it aside as well. I used pan spray on a 20 x 25 cm (~8 x 10″) pan for nice thick krispy treats, and it was really easy to get the them out when I was finished…but convenient aerosol pan spray isn’t very convenient to find in Japan, so you can also use a pump sprayer if you have one, or take the simplest route by smearing a small amount of butter all over the inside of the pan with a napkin or a paper towel.
3. Next, we want to brown the butter. If you’ve never done this before: don’t worry! It’s always a good time to learn and I’ll walk you through it!
We want to make this whole thing fairly easy~ish to clean up when we’re done, so we’ll do everything in one big pot, such as my trusty 5-liter stock pot. Plop the butter into the pan, and then turn the heat to low. Do not cover the pan.
This pan is kinda big for such a small amount of butter, but it will brown more quickly this way…and we’ll keep our eyes on it!
The butter will go through a couple of distinct stages, which can happen fairly quickly if you aren’t watching the pot. Butter is bratty that way.
Here’s a picture:
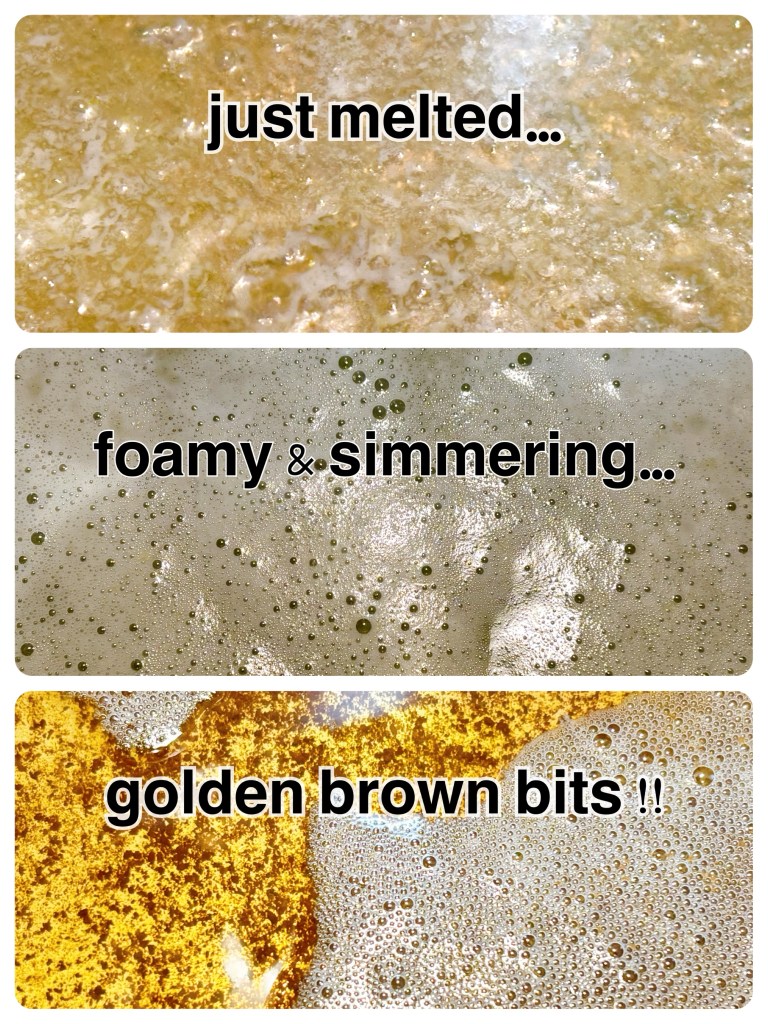
The first stage is simple: the butter melts and begins to steam a bit. This is normal & good. We want all of the water in the butter to cook out and evaporate its way back into the cosmos. You can stir it if you like—I recommend using a large, heat-resistant silicone spatula for this whole recipe—but it’s not super necessary at this beginning stage. You can just kick back, and watch science happen.
Next, you may notice these white blobs floating to the surface or dancing around like buttery jellyfish. This usually happens right before the butter begins to foam up, making it hard for us to see what’s going on. If you weren’t doing it before, now’s a good time to begin stirring gently, making sure to scrape the bottom of the pot. Keep the pot on low heat! And did I mention that you should keep your eyes on it? Okay.
As you stir, the frothy foamy butter will occasionally get outta the way, and you’ll see that the color of everything has changed somewhat: without the water, the butter looks…butterier…and the formerly white clumps of milk fat (yep!) we saw earlier are looking creamier & beginning to break apart. You definitely need to be stirring now! And that heat is still on low, right? Right??
Because our friend, Monsieur Maillard Reaction, will show up faster than you know, and we want this butter to have a nutty, warm flavor to it…not the taste of burnt milk fat. When you see that the specks and clumps in the butter are a light golden brown (and the smell becomes heavenly!), remove the pot from the heat, and leave it to cool for a minute or two. Nice work!
❤︎
❤︎
I’m gonna level with you here: I always keep browned butter in my fridge—hey! you never know!—and whenever I need more of it, I don’t watch it nearly as much as I should. I just wing a block of cold butter into whichever pan works, turn the heat down low, and go. do. other. shit.
But! When I get the faintest hint of that golden nutty scent in the air, I stop what I’m doing faster than an olde-timey French chemist can drop his monocle, and I gently stir the butter for another minute or two before removing it from the heat.
When you cook a lot of the same things over and over (& over!) again, you develop certain Jedi forces—I can actually smell when a cake is done!—but I still had to hone my mutant skills like everyone else…by craning my head over many a pot, waiting for Mssr. Maillard to come through.
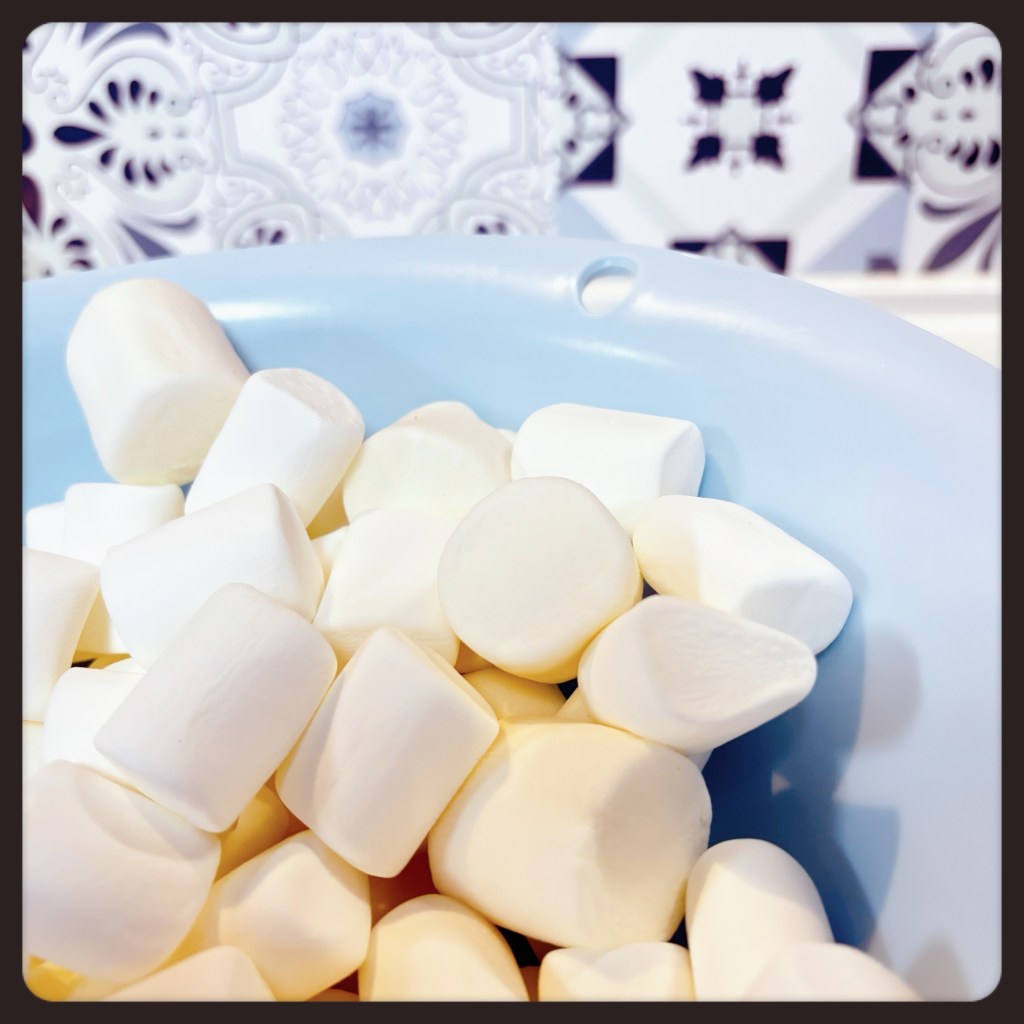
4. We don’t want our butter to cool too much, as we need its carry-over heat to melt the marshmallows. However, a bit cooler is kinda nice, as I made this recipe with extra marshmallows (yay!!) so that we could leave some chewy little blobs of ’em in the final product. Yum!
Dump the marshmallows into the pot, give them a gentle stir—you don’t have to mix ’em up all the way yet—and then add the vanilla and nutmeg. You can omit the nutmeg if you’re diametrically opposed to it or something, but it goes very well with the warm flavors of the browned butter and the toasted coconut, so I highly recommend it.
5. Stir everything together until the marshmallows are a little more than halfway melted, then pour in the toasted coconut and the krispy rice. Continue stirring, making sure to scrape the bottom and sides of the pan, so that everything mixes evenly. Ideally, when the krispy rice pieces & coconut flakes are evenly coated, there should still be some little blobs of marshmallow mixed throughout.

6. Pour the whole yummy mess into your prepared pan. Initially, you can use your silicone spatula to press the mess evenly into the pan—don’t press too hard! we don’t want to smash it into one hard, inedible block!—but that stops working around the time you notice that you can’t get everything into the corners. There are actual tons of suggestions for how to even out krispy treats (many of which either make even more dishes or are quite messy) but I’ve found that the easiest thing to do is to slightly wet your hands, shake off any excess water, and gently press your palms down on the krispy treats until they’re even.
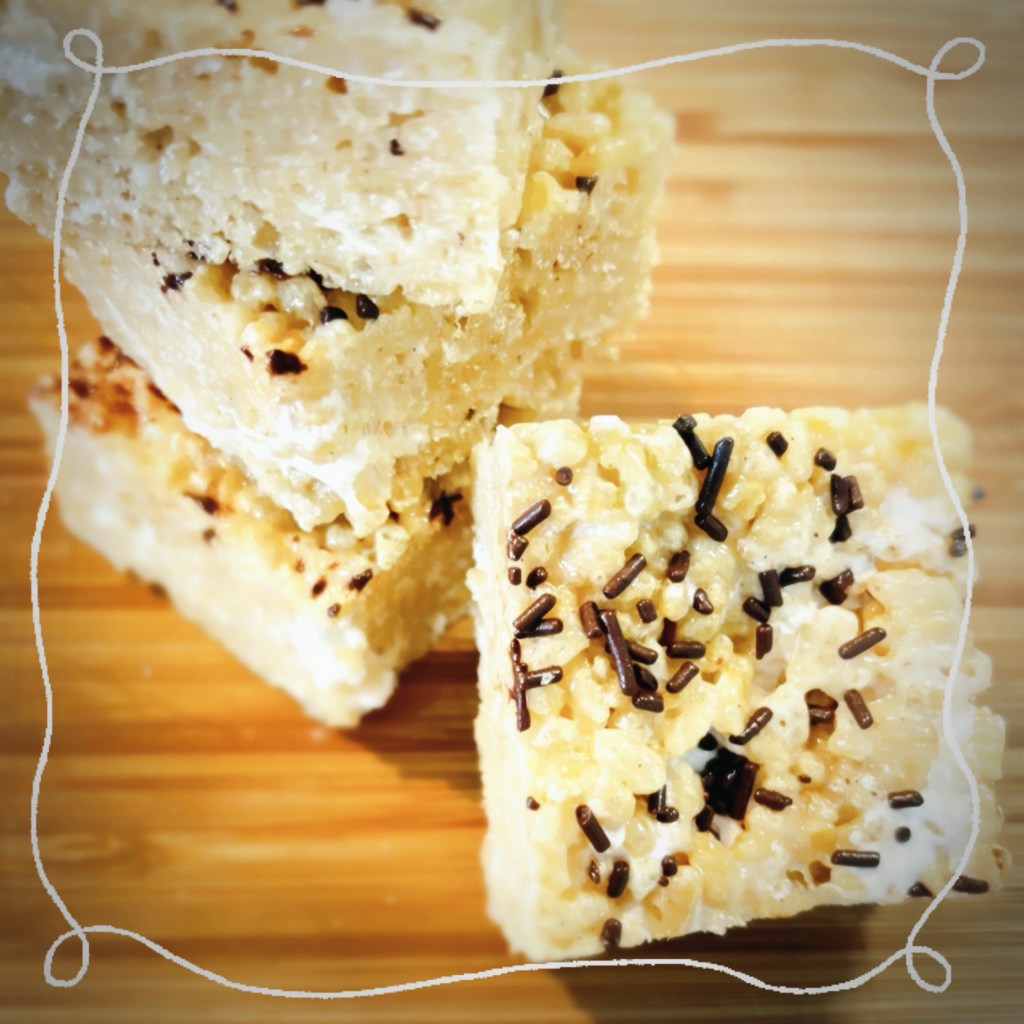
7. Finally, if you want to put some sprinkles on top, do so now, pressing ever so quickly and delicately to slightly stick them to the top of the treats before sliding the pan into the refrigerator for about thirty minutes.
Note: In the so-called “baking section” of Japanese grocery stores, you can often find little packages with a threesome of different kinds of sprinkles—rainbow, “chocolate”, and silver dragées—I used one pack of the chocolate kind to top this recipe, but you can use any kind you like…or omit them all together. Your choice!
After the krispy treats have set up, you can slice them with a sharp knife. I cut mine into 12 pieces, but you can just cut it in half, and make two big-ass krispy treats if that’s how you roll.
That’s it! Have fun!
Okay, I know this is a long recipe at first glance, but if you’ve read this far, it’s (hopefully) not very intimidating. And if you’ve made krispy treats before, you can see that there’s not much more effort to brown the butter. And trust me…the effort is worth it!
*Alternatively, you can toast the coconut in a 160°C / 325°F oven…it’ll just require a bit more time and patience.


Leave a comment